A sanctuary can look spacious from the entrance, yet tight rows, columns, and angled walls often reduce usable floor area. Before ordering chairs or pews, measure the room as people will use it, not simply as a rectangle on a plan. The phrase how to measure a church sanctuary for new seating layout points to more than wall-to-wall dimensions; it includes aisles, exits, platforms, accessible routes, and sightlines. Small details matter. A radiator, communion table, sound desk, or door swing can change where a row fits.
This guide presents five practical ways to capture the information needed before choosing a seating layout. You will compare room dimensions, mark permanent obstructions, check aisle and exit paths, and consider sightlines from likely seats. A tape measure or laser tool can help, but consistent reference points matter more than impressive equipment. Measure each wall, then verify key distances from a second point. Measure twice. Photographs and a simple scaled sketch can help you share findings with a seating supplier, facilities team, or installer. Keep movable items separate from fixed features; a piano may shift, while a column will not. No single method captures every concern. A plan can still overlook a low beam or a door that opens into a route. Before finalizing an arrangement, confirm relevant safety and accessibility guidance with qualified local professionals. These steps cannot guarantee a perfect fit, but they can reveal awkward gaps early, reduce revisions, and help the congregation choose seating suited to the room’s daily use.
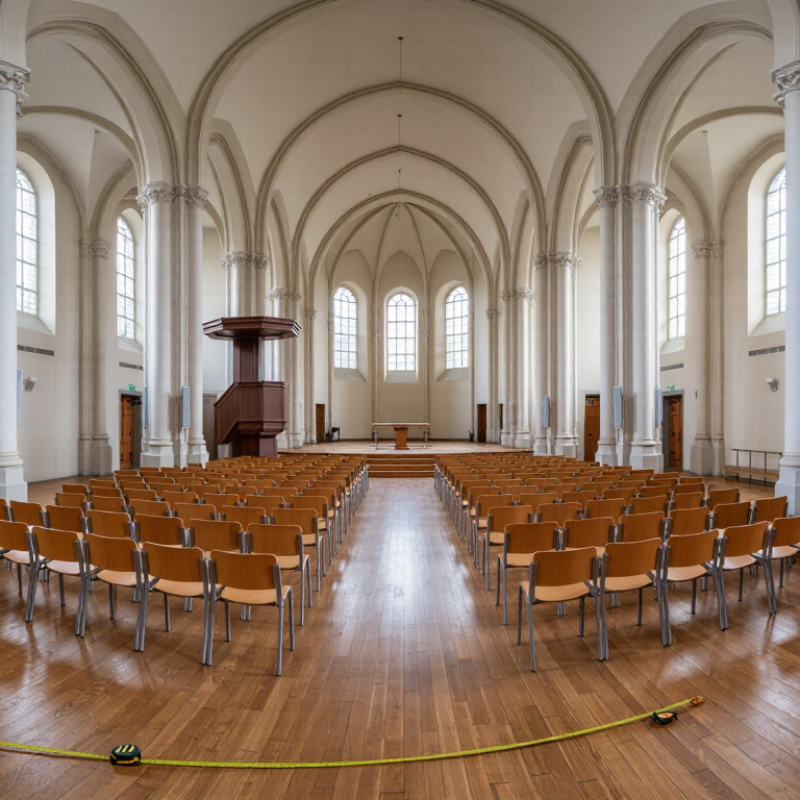
Assess the room before ordering chairs. Measure the sanctuary’s usable floor area, excluding the platform, sound booth, storage, and fixed obstacles. Then mark the required aisles, exits, and accessible seating on a scaled plan. A tape measure can miss awkward corners. Check them in person.
The 2021 International Building Code lists 7 net square feet per person for assembly areas with concentrated chairs, and 15 for areas with tables and chairs (Table 1004.5). These are occupant-load factors, not guaranteed comfort targets; local officials determine applicable requirements. For fixed pews, count the seats rather than estimating from floor area. The 2010 ADA Standards also set minimum wheelchair-space counts by seating capacity: one space for 4–25 seats, and four for 51–150 (Table 221.2.1.1). Confirm current local accessibility rules before finalizing the layout.
Next, test a real seating plan with chair widths, row spacing, and clear aisle paths. Include space for walkers, mobility devices, and people entering late. Ask ushers where congestion forms during busy services; their observations often reveal pinch points a drawing hides. I’ve found that one extra row can look efficient on paper, yet leave little room for movement. That trade-off deserves a second look.
Measure the sanctuary at floor level, from finished wall to finished wall. Record the longest usable length and the widest point, since older rooms are not always square. Bring a helper. Keep the tape straight, and note where columns, alcoves, or angled walls change the room’s outline. Measure twice; a small error can shift an entire seating row.
Length and width give a useful starting point, but they do not show how much floor can actually hold seats. Sketch the room and mark the platform, permanent sound equipment, radiators, pillars, and door swings. Measure each obstruction and subtract its footprint from the overall area. For an irregular sanctuary, divide the sketch into rectangles, calculate each area, then add them together. It is a practical estimate, not a perfect model.
Mark the main aisles and routes to exits before testing a seating layout. Include space for people to enter rows and move comfortably, rather than filling every open patch with chairs. A paper grid or removable floor tape can reveal awkward gaps near walls and corners. I have found that a quick sketch sometimes misses a shallow bump-out; recheck the room on site before ordering seats. Keep the measurements and sketch together so others can review the assumptions.
A worked example: a sanctuary measuring 80 ft × 60 ft has 4,800 sq ft of gross floor area. After excluding the platform, fixed structures, and circulation clearances, 3,400 sq ft remains for seating.
Before choosing new seating, sketch the sanctuary and mark every feature that cannot move. Include columns, platform edges, radiators, wall-mounted equipment, and doors. Measure from fixed reference points, such as a rear corner, rather than estimating by eye. Small errors add up.
Note obstacles at floor level and overhead. Record step locations, floor boxes, low beams, and any doors that swing into seating areas. Photograph each feature and label its location on the sketch. Measure narrow passages at their tightest point, not where they look widest. I once overlooked a door handle’s reach into an aisle; the drawing seemed clear, but the usable path was not.
Then map accessible routes from entrances to seating, worship areas, and restrooms. Keep routes continuous and free of chair legs, temporary signs, and stored items. Check turning spaces and passage widths against applicable accessibility guidance for your location. Don’t assume an existing route works just because people use it. Recheck measurements with another person, especially around corners and transitions. Notes can be imperfect; mark uncertain dimensions and verify them before ordering seats.
Measure the sanctuary’s usable floor area, not just the wall-to-wall dimensions. Record columns, steps, doors, the platform edge, and any fixed equipment on a simple sketch. Measure each wall twice; small errors can shift an entire row. Mark exit routes and door swings before drawing seating. Keep those paths clear, and confirm required aisle widths and accessible seating spaces against local building and fire-safety requirements.
Map the main aisles from the entrance to the platform, then add cross-aisles where people need to reach seats without squeezing past a full row. For each seating row, note the seat width, armrests, and the distance from one row’s back to the next. Test the layout with full-size paper or tape outlines. A plan can look roomy on screen and feel tight when knees, coats, and people are in the picture. I have seen that detail missed.
Measure the sanctuary’s length and width in several places; older rooms are rarely perfectly square. Record columns, doors, steps, the platform edge, and fixed equipment. These features reduce usable floor area. Mark them on a simple plan, then compare layouts within the space that remains.
A straight-row layout may fit more chairs, while angled rows can improve sightlines but need extra room at the sides. Sketch each option with aisles and required access spaces included. Then estimate seats per row and total capacity. Keep wheelchair spaces and companion seating in the plan, not as an afterthought. Check local safety and accessibility requirements before setting final aisle widths. More seats are not always better.
Use painter’s tape to outline a few rows on the floor. Walk the routes from entrances to seats, and sit in several spots to check views of the platform. Small details matter. A drawing can make a layout look generous, but a door swing or a wide column may change the count. Measurements also shift when taken in a hurry; recheck key distances before ordering seating, and leave some flexibility for events that need wider circulation.
| Measurement Method | What to Measure | Illustrative Finding | Layout to Compare | Planning-Level Seat Estimate | Why It Matters |
|---|---|---|---|---|---|
| 1. Measure the clear interior dimensions | Measure the usable seating zone wall to wall, then note its length and width. Check more than one point if walls or finishes are irregular. | Clear seating zone: 48 ft wide × 28 ft deep = 1,344 sq ft, before assigning aisles or other circulation space. | Straight rows with a center aisle and two side aisles; use the measured width to plan seat blocks and the depth to estimate row count. | About 175–190 seats, depending on aisle widths and the final row spacing. | A reliable room outline prevents layouts from being based on gross building dimensions that include the stage, walls, or other unusable areas. |
| 2. Map fixed features and exclusions | Locate the platform, columns, steps, doors, radiators, sound or lighting equipment, and any areas that must remain clear. | Suppose mapped features and reserved areas remove about 120 sq ft from the example seating zone, leaving roughly 1,224 sq ft for seating and circulation. | Two seating blocks around columns or other obstructions, with clear routes to exits and the front of the room. | About 155–175 seats, depending on the obstruction locations and aisle arrangement. | A scaled plan reveals unusable pockets and helps avoid placing chairs where they would block doors, routes, or sightlines. |
| 3. Measure and draw aisle routes | Mark side and cross-aisles, routes to exits, and any required clear paths before filling the remaining area with seats. | For comparison, reserve a 4 ft-wide center aisle and two 3 ft-wide side aisles across the 28 ft seating depth. Confirm all required widths locally. | Two blocks of straight rows, with a center aisle and side circulation. | About 160–180 seats in this example, subject to the final aisle plan and applicable requirements. | Aisles affect both capacity and safe circulation. Required widths and egress arrangements depend on the building and local codes. |
| 4. Test chair width and row spacing on the plan | Use the actual chair width and the proposed front-to-back row pitch. Include space for people to enter and leave rows. | Example planning assumptions: chairs about 20 in wide and rows about 36 in apart. A 28 ft-deep zone can accommodate roughly 9 rows before allowances for edges and circulation. | Straight rows versus gently angled or chevron rows, using the same room outline and circulation plan. | Straight rows: about 175–190. Chevron rows: roughly 150–175 because angled rows can use the room less efficiently. | Small changes to chair width or row pitch can change the number of seats per row and the number of usable rows. |
| 5. Check accessible seating and verify the target | Mark wheelchair spaces, companion seats, accessible routes, and locations with suitable sightlines. Then compare the measured plan with the desired attendance capacity. | For a 170-seat goal, test whether the plan can provide about 170 places while keeping accessible positions distributed and routes unobstructed. | Compare a fixed all-row layout with a flexible layout that includes designated accessible positions and movable seating where appropriate. | Flexible plan: often about 150–175 seats in this example; the final count depends on the accessible design and circulation layout. | Capacity is useful only when the arrangement works for the congregation. Confirm accessibility, egress, and occupancy requirements with qualified local professionals. |
| Planning note: All dimensions and seat counts above are illustrative estimates, not a code-approved occupancy limit. Actual capacity depends on the measured room, selected seating, aisle and exit requirements, accessibility provisions, and local authority approval. | |||||
Measure usable floor area, excluding the platform, sound booth, storage, and fixed obstacles. Corners can fool you. Check them in person.
The 2021 International Building Code lists 7 net square feet per person for concentrated chairs. For tables and chairs, it lists 15. These are occupant-load factors, not comfort guarantees; confirm local requirements.
The 2010 ADA Standards list one wheelchair space for 4–25 seats and four for 51–150. Check current local accessibility rules before finalizing the plan.
Mark columns, doors, steps, radiators, platform edges, floor boxes, and overhead obstacles. Measure narrow passages at their tightest point. Measure twice.
Map continuous paths from entrances to seating, worship areas, and restrooms. Keep chair legs, signs, and stored items out of these routes. That matters.
Record seat width, armrests, and the distance between rows. Test the plan with tape or full-size paper outlines; knees and coats take space.
Door handles, swinging doors, and awkward corners can reduce usable clearance. A drawing can still be wrong. Recheck uncertain measurements with another person.
Ask a qualified seating planner or local building professional to review clearances, sightlines, and access routes. Leave some flexibility; the first plan may need work.
Planning new seating for a church sanctuary begins with understanding how the space is used, how many people it should accommodate, and what comfort and accessibility needs must be met. A careful approach to how to measure a church sanctuary for new seating layout starts by measuring the room’s length and width, then identifying the usable floor area rather than assuming every open-looking space can hold seats.
Next, record fixed features and obstacles, such as platforms, columns, doors, and equipment, along with accessible routes that need to remain clear. Use these measurements to map seating rows and aisles, allowing suitable clearance for movement and entry. Finally, compare possible seating arrangements with the sanctuary’s dimensions and capacity goals. Reviewing more than one layout can help reveal practical trade-offs between the number of seats, clear circulation paths, and a comfortable experience for the congregation.

Zabs Furniture